安装与配置
详细介绍 Vuepress 的安装、配置、高级用法(组件覆盖、主题修改)
开始安装 vuepress
vueprss 安装分为全局安装以及将 vuepress 作为本地项目依赖两种安装方式.
我选择的是将 vuepress 作为本地项目依赖,这也是官方推荐的安装方式
- 设置 yarn 源
查看当前设置的镜像源地址:
yarn config get registry
得到输出如下:
https://registry.yarnpkg.com
修改 yarn 源:
yarn config set registry 'https://registry.npmmirror.com'
开始安装 vuepress1.7.1
本文会帮助你从头搭建一个简单的 VuePress 文档。如果你想在一个现有项目中使用 VuePress 管理文档,从步骤 3 开始。
- 创建并进入一个新目录
mkdir -p vuepress && cd vuepress
- 使用你喜欢的包管理器进行初始化
yarn init # npm init
- 将 VuePress 安装为本地依赖
我们已经不再推荐全局安装 VuePress
yarn add -D vuepress # npm install -D vuepress
注意
如果你的现有项目依赖了 webpack 3.x,我们推荐使用 Yarn (opens new window)而不是 npm 来安装 VuePress。因为在这种情形下,npm 会生成错误的依赖树。
- 创建你的第一篇文档
mkdir docs && echo '# Hello VuePress' > docs/README.md
- 在 package.json 中添加一些 scripts
这一步骤是可选的,但我们推荐你完成它。在下文中,我们会默认这些 scripts 已经被添加。
{
  "scripts": {
    "docs:dev": "vuepress dev docs",
    "docs:build": "vuepress build docs"
  }
}
- 在本地启动服务器
yarn docs:dev # npm run docs:dev
不能在powershell中运行yarn
这是由于windows安全机制导致的,解决方法如下:
搜索powershell,右键以管理员身份运行
Set-ExecutionPolicy -ExecutionPolicy RemoteSigned -Scope CurrentUser
RemoteSigned表示支持执行本地及远程脚本。
常用命令:
删除策略: Set-ExecutionPolicy -ExecutionPolicy Undefined -Scope CurrentUser
查看当前策略: Get-ExecutionPolicy -List
然后重启powershell即可。
安装报错
vuepress 安装报错:UnhandledPromiseRejectionWarning: TypeError: res.getHeader is not a function
解决办法:
修改cat ~/.config/yarn/global/package.jsons
{
  "dependencies": {
    "vuepress": "^0.14.10"
  },
  "resolutions": {
    "webpack-dev-middleware": "3.6.0"
  }
}
再执行yarn install
如下是 vuepress1.7.1 的 package,json
{
  "license": "MIT",
  "devDependencies": {
    "@vuepress/plugin-back-to-top": "^1.7.1",
    "@vuepress/plugin-medium-zoom": "^1.7.1",
    "@vuepress/plugin-pwa": "^1.7.1",
    "vuepress": "^1.7.1"
  },
  "scripts": {
    "docs:dev": "vuepress dev docs",
    "docs:build": "vuepress build docs"
  },
  "dependencies": {}
}
docs:build构建报错
通过yarn docs:build 构建项目时报错如下:
[Vue warn]: Error in render: "RangeError: Maximum call stack size exceeded"
此报错是由于vue-router3.4.6引发的。
解决办法:
yarn add -D vue-router@3.4.5
docs:build RangeError: Maximum call stack size exceeded
添加 vuepress 环境变量
sudo ln -s /home/echoxu/software/vuepress/node_modules/vuepress/bin/vuepress.js /usr/bin/vuepress
更新 vuepress 版本
在你的vuepress项目根目录执行下面的命令:
yarn upgrade -D vuepress@next
yarn add -D vuepress
yarn add -D @vuepress/plugin-back-to-top
yarn add -D @vuepress/plugin-medium-zoom
yarn add -D @vuepress/plugin-pwa
安装插件
yarn add -D @vuepress/plugin-back-to-top@next
将如下内容添加到 config.js 中:
module.exports = {
  plugins: ["@vuepress/back-to-top"],
};
覆盖默认主题配置
vuepress0 版本在docs/.vuepress/override.styl中添加 css 进行默认样式覆盖即可
vuepress1 版本在docs/.vuepress/styles/palette.styl中添加 css 进行默认样式覆盖
个性化定制
vim docs/.vuepress/styles/palette.styl
添加如下内容:
/*定义滚动条高宽及背景 高宽分别对应横竖滚动条的尺寸*/
::-webkit-scrollbar {
  width: 8px;
  height: 8px;
  border-radius: 10px;
  background-color: #f5f5f5;
}

/*定义滚动条轨道 内阴影+圆角*/
::-webkit-scrollbar-track {
  border-radius: 10px;
  -webkit-box-shadow: inset 0 0 6px rgba(0, 0, 0, 0.3);
  background-color: #f5f5f5;
}

/*定义滑块 内阴影+圆角*/
::-webkit-scrollbar-thumb {
  border-radius: 10px;
  -webkit-box-shadow: inset 0 0 6px rgba(0, 0, 0, 0.3);
  border-radius: 10px;
  /* 线性渐变 */
  background-image: -webkit-gradient(
    linear,
    left bottom,
    left top,
    color-stop(0.44, rgb(60, 186, 146)),
    color-stop(0.72, rgb(253, 187, 45)),
    color-stop(0.86, rgb(253, 187, 45))
  );
  transition: 0.3s ease-in-out;
}
/*定义滑块悬浮样式*/
::-webkit-scrollbar-thumb:hover {
  background-image: -webkit-gradient(
    linear,
    left bottom,
    left top,
    color-stop(0.44, rgb(253, 187, 45)),
    olor-stop(0.72, rgb(253, 187, 45)),
    color-stop(0.86, rgb(60, 186, 146))
  );
  transition: 0.3s ease-in-out;
}

/*修改prev和next的max-width*/
.page-edit,
.page-nav {
  max-width: 1040px;
}
vim docs/.vuepress/styles/index.styl
添加如下内容:
/*修改sidebar宽度*/
.sidebar {
  width: 16rem;
}
/*修改内容区最大宽度*/
.content:not(.custom) {
  max-width: 1040px;
}
/*修改内容区和sidebar之间的间距*/
.page {
  padding-left: 15rem;
}
页面应用定制 css 及 layout
- 使用定制的 css
有时需要在不同的页面应用不同的 css,可以先在该页面中声明
---
pageClass: custom-page-class
---
然后在palette.styl中书写
.theme-container.custom-page-class {
  /* 特定页面的 CSS */
}
- 使用定制的 layout
如果想使某个单独页面使用特定的 layout,可在docs/.vuepress/theme/layouts中添加如GlobalLayout.vue这样的文件,在其里面添加内容.
然后在docs/.vuepress/theme/index.js中添加如下内容。
module.exports = {
  extend: "@vuepress/theme-default",
  globalLayout: "layouts/GlobalLayout.vue",
};
最后在页面的.md文件中引用即可.
---
permalink: /gitErr
layout: GlobalLayout
---
head 添加 js 及 css 文件
   head: [
+       ['link', { rel: 'stylesheet', type: 'text/css', href: 'https://cache.echoxu.cn/blogimg/test.css' }],
+       ['script', { src: 'https://cache.echoxu.cn/blogimg/test.js' }],

    ],
注意
暂不支持在</body>里添加额外的 css 或者 js 文件
修改全局 header 及 footer
vim docs/.vuepress/theme/layouts/GlobalLayout.vue
添加:
<template>
  <div id="global-layout">
    <component :is="layout" />
    <footer>
      <center>
        <a href="https://www.echoxu.cn">PC|</a>
        <a href="https://m.echoxu.cn">移动端</a>
        <p>Copyright © 2019 www.echoxu.cn</p>
      </center>
    </footer>
  </div>
</template>

<script>
export default {
  computed: {
    layout() {
      if (this.$page.path) {
        if (this.$frontmatter.layout) {
          // 你也可以像默认的 globalLayout 一样首先检测 layout 是否存在
          return this.$frontmatter.layout;
        }
        return "Layout";
      }
      return "NotFound";
    },
  },
};
</script>
然后在docs/.vuepress/theme/index.js中添加如下内容。
module.exports = {
  extend: "@vuepress/theme-default",
  globalLayout: "layouts/GlobalLayout.vue",
};
Service Worker
开启 themeConfig.serviceWorker.updatePopup 选项,将开启一个能够刷新内容的弹窗。当网站更新(即 Service Worker 更新)时,它会提供一个 refresh 按钮,允许用户立刻刷新内容。
安装 pwa 插件:
yarn add -D @vuepress/plugin-pwa@next
使用 pwa:
vim config/pluginConf.js
module.exports = {
    '@vuepress/back-to-top': true,
    '@vuepress/medium-zoom': true,
 +  '@vuepress/pwa': {
 +            serviceWorker: true,
 +            updatePopup: {
 +            message: "啦啦啦,一大波内容已更新!",
 +            buttonText: "朕知道了"
 +           }
          }
}
生成 manifest 和 favicon
- 生成 manifest
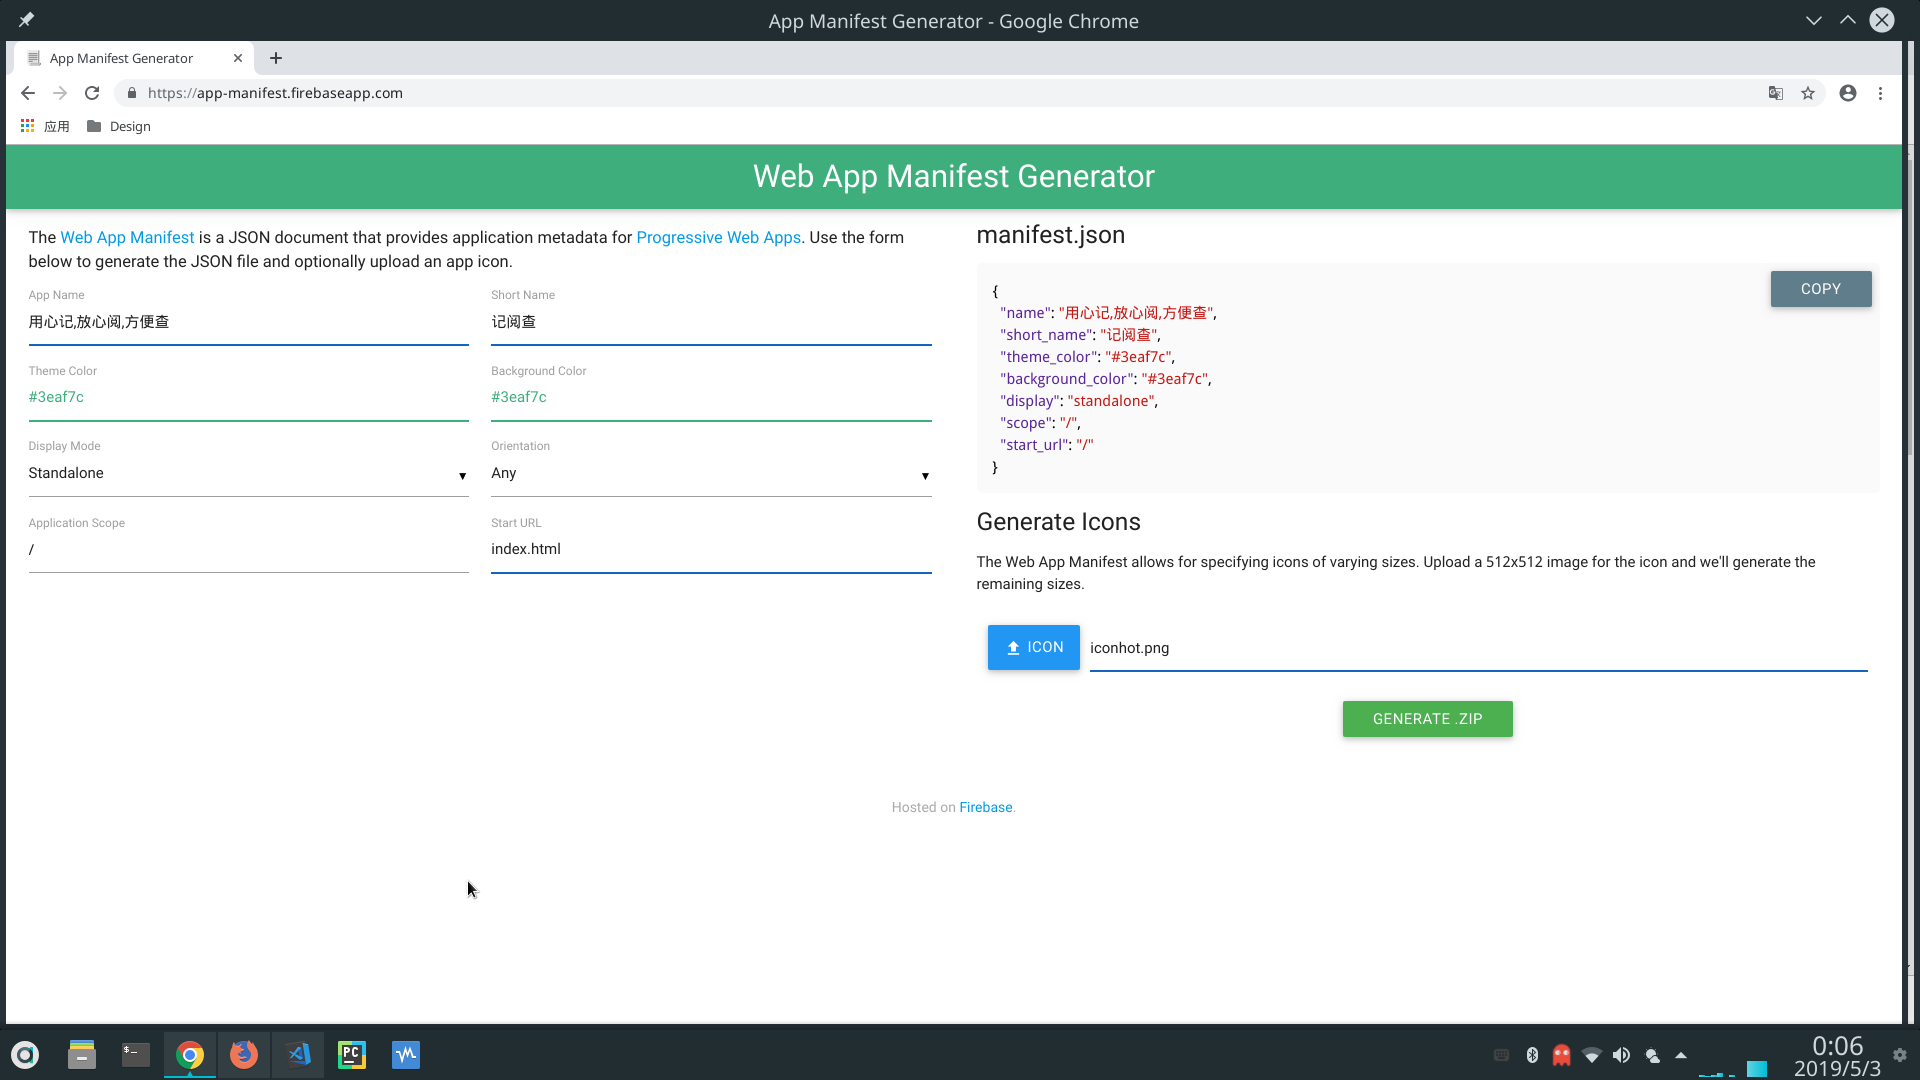
serviceWorker 选项仅仅用来控制 service worker,为了让你的网站完全地兼容 PWA,你需要在 .vuepress/public 提供 Manifest 和 icons,更多细节,请参见 MDN docs about the Web App Manifest. 此外,只有您能够使用 SSL 部署您的站点时才能启用此功能,因为 service worker 只能在 HTTPs 的 URL 下注册。
在线生成 manifest 文件的操作如下图:

注意
上面图片中的 Application Scope 设置为空
将生成好的 manifest 文件下载到本地,编辑docs/.vuepress/public/manifest.json
添加如下:
{
  "name": "用心记,放心阅,方便查",
  "short_name": "记阅查",
  "description": "echoxu.cn是一个IT知识点记录并整合的文档生成器.IT知识,文档管理,文档记录,文档生成器",
  "theme_color": "#3eaf7c",
  "background_color": "#3eaf7c",
  "display": "standalone",
  "start_url": "index.html",
  "icons": [
    {
      "src": "https://cache.echoxu.cn/blogimg/icon-72x72.png",
      "sizes": "72x72",
      "type": "image/png"
    },
    {
      "src": "https://cache.echoxu.cn/blogimg/icon-96x96.png",
      "sizes": "96x96",
      "type": "image/png"
    },
    {
      "src": "https://cache.echoxu.cn/blogimg/icon-128x128.png",
      "sizes": "128x128",
      "type": "image/png"
    },
    {
      "src": "https://cache.echoxu.cn/blogimg/icon-144x144.png",
      "sizes": "144x144",
      "type": "image/png"
    },
    {
      "src": "https://cache.echoxu.cn/blogimg/icon-152x152.png",
      "sizes": "152x152",
      "type": "image/png"
    },
    {
      "src": "https://cache.echoxu.cn/blogimg/icon-192x192.png",
      "sizes": "192x192",
      "type": "image/png"
    },
    {
      "src": "https://cache.echoxu.cn/blogimg/icon-384x384.png",
      "sizes": "384x384",
      "type": "image/png"
    },
    {
      "src": "https://cache.echoxu.cn/blogimg/icon-512x512.png",
      "sizes": "512x512",
      "type": "image/png"
    }
  ]
}
- 生成 favicon
将上面生成的 favicon 文件下载到本地并编辑docs/.vuepress/config.js
新增内容如下:
const navConf = require("../../config/navConf.js");
const pluginConf = require("../../config/pluginConf.js");
const sidebarConf = require("../../config/sidebarConf.js");
module.exports = {
  title: "用心记,放心阅,方便查",
  description:
    "echoxu.cn是一个IT知识点记录并整合的文档生成器.IT知识,文档管理,文档记录,文档生成器",
  locales: {
    "/": {
      lang: "zh-CN",
    },
  },
  head: [
    +[
      "link",
      {
        rel: "apple-touch-icon",
        href: "https://cache.echoxu.cn/blogimg/apple-touch-icon.png",
      },
    ],
    +[
      "link",
      { rel: "icon", href: "https://cache.echoxu.cn/blogimg/favicon-32x32.png" },
    ],
    +["link", { rel: "manifest", href: "/manifest.json" }],
    +[
      "link",
      {
        rel: "mask-icon",
        href: "https://cache.echoxu.cn/blogimg/safari-pinned-tab.svg",
      },
    ],
    +["meta", { name: "theme-color", content: "#3eaf7c" }],
    +["meta", { name: "msapplication-TileColor", content: "#3eaf7c" }],
  ],
  plugins: pluginConf,
  themeConfig: {
    lastUpdated: "上次更新",
    sidebarDepth: 1,
    nav: navConf,
    sidebar: sidebarConf,
  },
};
自定义 SW-Update Popup 的 UI
默认的 SW-Update Popup 组件提供了一个默认插槽,使您能够完全控制弹窗的外观。
首先,您需要在 .vuepress/components 中创建一个全局组件(例如MySWUpdatePopup)。 一个基于默认组件创建的简单组件如下:
vim docs/.vuepress/components/MySWUpdatePopup.vue
新增如下内容:
<template>
  <SWUpdatePopup>
    <div v-if="enabled"
      slot-scope="{ enabled, reload, message, buttonText }"
      class="my-sw-update-popup">
      {{ message }}
      <br><button @click="reload">{{ buttonText }}</button></br>
    </div>
  </SWUpdatePopup>
</template>

<script>
import SWUpdatePopup from '@vuepress/plugin-pwa/lib/SWUpdatePopup.vue'
export default {
  components: { SWUpdatePopup }
}
</script>

<style>
.my-sw-update-popup {
  text-align: right;
  position: fixed;
  bottom: 20px;
  right: 20px;
  background-color: #fff;
  color:#6a8bad;
  font-size: 19px;
  padding: 15px;
  margin: 0px 15px;
  border: 3px solid #4db6ac;
}

.my-sw-update-popup button {
  background-color: #4db6ac;
  -moz-border-radius:28px;
  -webkit-border-radius:28px;
  border-radius:28px;
  border:1px solid #18ab29;
  display:inline-block;
  cursor:pointer;
  color:#fff;
  font-family:Arial;
  font-size:17px;
  margin: 12px 50px;
  padding:13px 30px;
  text-decoration:none;
  text-shadow:0px 1px 0px #2f6627;

}

.my-sw-update-popup button:hover {
  background-color:#3eaf7c;
}
</style>
注意
添加 v-if="enabled",否则 popup 无法消失
最后再更新config/pluginConf.js
module.exports = {
    '@vuepress/back-to-top': true,
    '@vuepress/medium-zoom': true,
    '@vuepress/pwa': {
             serviceWorker: true,
      +      popupComponent: 'MySWUpdatePopup',
             updatePopup: {
             message: "啦啦啦,一大波内容已更新!",
             buttonText: "朕知道了"
            }
          }
}
手机端显示效果:

PC 端显示效果:

使用 algolia 搜索
ps: 根据 Algolia 的邮件回复,指出本站不在他们的支持范围之内,所以只能自建 Algolia 服务器了. 😂😂😂
创建 algolia 账号
先去官网注册一个账号,并获取到APPLICATION_ID以及API_KEY
注意
API_KEY 必须具有search, addObject, editSettings, deleteIndex权限,请在API Keys---All API Keys---ACL中添加权限
设置环境
因为使用的是 docker 镜像,所以先安装docker及jq,而 pip 安装需要使用到 ssl 协议所以需要安装openssl及openssl-devel
- 安装依赖
sudo yum -y install docker jq openssl openssl-devel
- 设置环境
在你项目根目录下创建.env文件:
vim ~/software/vuepress/.env
添加:
APPLICATION_ID=MGNDI****
API_KEY=754e2e3c7********************
生成 config.json 文件
因为用docsearch-scraper生成索引需要用到 config.json 文件,所以需先生成它.生成 config.json 文件有两种方法,选一即可:
第一种:
- 根据docsearch-configs 范例自己创建:
vim ~/software/vuepress/config.json
内容如下:
{
  "index_name": "wwwechoxu",
  "start_urls": ["https://www.echoxu.cn/"],
  "stop_urls": [],
  "selectors": {
    "lvl0": {
      "selector": "p.sidebar-heading.open",
      "global": true,
      "default_value": "Documentation"
    },
    "lvl1": ".content h1",
    "lvl2": ".content h2",
    "lvl3": ".content h3",
    "lvl4": ".content h4",
    "lvl5": ".content h5",
    "text": ".content p, .content ul, .content li, a.header-anchor"
  },
  "stop_content": ["The page you requested does not exist"],
  "objectID": "160481722"
}
下面的链接对创建 index 索引有帮助:
第二种:
- 使用
docsearch-scraper提供的命令./docsearch bootstrap自动生成 config.json 文件.
生成索引
生成索引也有两种方法:
官网提供了docsearch-scraper的 docker 镜像,我们使用 docker 就能很轻松的生成索引.
使用阿里云 docker 加速器给 docker 加速
去阿里云容器 HUB开通服务并设置密码,然后找到镜像加速器获取你的加速器.
在你的 docker 服务器上编辑/etc/docker/daemon.json:
sudo mkdir -p /etc/docker
sudo tee /etc/docker/daemon.json <<-'EOF'
{
  "registry-mirrors": ["https://vzxr9yq5.mirror.aliyuncs.com"]
}
EOF
sudo systemctl daemon-reload
sudo systemctl restart docker
docsearch-scraper Docker 镜像生成索引(推荐)
sudo docker run -it --env-file=/home/echoxu/software/vuepress/.env -e "CONFIG=$(cat /home/echoxu/software/vuepress/config.json | jq -r tostring)" algolia/docsearch-scraper
上面的命令会自动下载 docsearch-scraper 的 docker 镜像并生成索引。
安装结果如下:
[echoxu@izuf63ewkwzrm8b1mgxl7uz ~]$ sudo docker run -it --env-file=/home/echoxu/.env -e "CONFIG=$(cat /home/echoxu/config.json | jq -r tostring)" algolia/docsearch-scraper
> DocSearch: https://www.echoxu.cn/ 13 records)
> DocSearch: https://www.echoxu.cn/mongodb/ 3 records)
> DocSearch: https://www.echoxu.cn/vuepress/ 0 records)
> DocSearch: https://www.echoxu.cn/secandopt/ 9 records)
> DocSearch: https://www.echoxu.cn/Failureandmaintenance/ 3 records)
> DocSearch: https://www.echoxu.cn/Virtualization/ 3 records)
> DocSearch: https://www.echoxu.cn/linuxbasics/ 14 records)
> DocSearch: https://www.echoxu.cn/mysql/ 7 records)
> DocSearch: https://www.echoxu.cn/redis/ 3 records)
> DocSearch: https://www.echoxu.cn/others/ 27 records)
> DocSearch: https://www.echoxu.cn/toolshelp/ 3 records)
> DocSearch: https://www.echoxu.cn/webdev/ 3 records)
> DocSearch: https://www.echoxu.cn/proxy/ 3 records)
> DocSearch: https://www.echoxu.cn/basicservicebulding/ 7 records)
> DocSearch: https://www.echoxu.cn/apache/ 3 records)
> DocSearch: https://www.echoxu.cn/tomcat/ 3 records)
> DocSearch: https://www.echoxu.cn/python/ 3 records)
> DocSearch: https://www.echoxu.cn/Microservice/ 3 records)
> DocSearch: https://www.echoxu.cn/nginx/ 7 records)
> DocSearch: https://www.echoxu.cn/mongodbtips/ 2 records)
> DocSearch: https://www.echoxu.cn/htmlAndCSS/ 2 records)
> DocSearch: https://www.echoxu.cn/hackTools/ 2 records)
> DocSearch: https://www.echoxu.cn/qiniu/ 37 records)
> DocSearch: https://www.echoxu.cn/gitAndJenkins/ 163 records)
> DocSearch: https://www.echoxu.cn/m3u8/ 25 records)
> DocSearch: https://www.echoxu.cn/tcmalloc/ 47 records)
> DocSearch: https://www.echoxu.cn/pi3bPlus/ 172 records)
> DocSearch: https://www.echoxu.cn/ubuntuOPT/ 85 records)
> DocSearch: https://www.echoxu.cn/pi/ 33 records)
> DocSearch: https://www.echoxu.cn/manjaroInstall/ 101 records)
> DocSearch: https://www.echoxu.cn/sshdaemon/ 49 records)
> DocSearch: https://www.echoxu.cn/sshErr/ 7 records)
> DocSearch: https://www.echoxu.cn/multipleSSHKeys/ 61 records)
> DocSearch: https://www.echoxu.cn/hexoOPT/ 177 records)
> DocSearch: https://www.echoxu.cn/linuxBootOPT/ 72 records)
> DocSearch: https://www.echoxu.cn/ss/ 70 records)
> DocSearch: https://www.echoxu.cn/manjaroDriveErr/ 74 records)
> DocSearch: https://www.echoxu.cn/vagrantupErr/ 26 records)
> DocSearch: https://www.echoxu.cn/vagrantAddDisk/ 87 records)
> DocSearch: https://www.echoxu.cn/wpOPT/ 80 records)
> DocSearch: https://www.echoxu.cn/gitErr/ 33 records)
> DocSearch: https://www.echoxu.cn/redistips/ 2 records)
> DocSearch: https://www.echoxu.cn/mysqlBasic/ 2 records)
> DocSearch: https://www.echoxu.cn/Xtrabackup/ 130 records)
> DocSearch: https://www.echoxu.cn/mongodbErr/ 2 records)
> DocSearch: https://www.echoxu.cn/nginxtips/ 2 records)
> DocSearch: https://www.echoxu.cn/nginxpcormobile/ 43 records)
> DocSearch: https://www.echoxu.cn/ntcmalloc/ 47 records)
> DocSearch: https://www.echoxu.cn/nginxopt/ 9 records)
> DocSearch: https://www.echoxu.cn/k8s/ 2 records)
> DocSearch: https://www.echoxu.cn/pythontips/ 2 records)
> DocSearch: https://www.echoxu.cn/tomcatskill/ 2 records)
> DocSearch: https://www.echoxu.cn/webtools/ 2 records)
> DocSearch: https://www.echoxu.cn/vue/ 2 records)
> DocSearch: https://www.echoxu.cn/apacheskill/ 2 records)
> DocSearch: https://www.echoxu.cn/gitServer/ 145 records)
> DocSearch: https://www.echoxu.cn/NFS/ 161 records)
> DocSearch: https://www.echoxu.cn/DNS/ 107 records)
> DocSearch: https://www.echoxu.cn/haproxy/ 2 records)
> DocSearch: https://www.echoxu.cn/mysqlOPT/ 120 records)
> DocSearch: https://www.echoxu.cn/nfsInotifyRsync/ 69 records)
> DocSearch: https://www.echoxu.cn/yum/ 133 records)
> DocSearch: https://www.echoxu.cn/ntp/ 25 records)
> DocSearch: https://www.echoxu.cn/libpathsearch/ 92 records)
> DocSearch: https://www.echoxu.cn/linuxtipswritting/ 298 records)
> DocSearch: https://www.echoxu.cn/architecture/ 0 records)
> DocSearch: https://www.echoxu.cn/rpmsrc/ 135 records)
> DocSearch: https://www.echoxu.cn/logrotate/ 58 records)
> DocSearch: https://www.echoxu.cn/mysqlErr/ 2 records)
> DocSearch: https://www.echoxu.cn/rediserr/ 2 records)
> DocSearch: https://www.echoxu.cn/shell/ 34 records)
> DocSearch: https://www.echoxu.cn/kvm/ 2 records)
> DocSearch: https://www.echoxu.cn/linuxinstall/ 2 records)
> DocSearch: https://www.echoxu.cn/LinuxSEC_NET/ 2 records)
> DocSearch: https://www.echoxu.cn/LinuxSEC_Basic/ 2 records)
> DocSearch: https://www.echoxu.cn/LinuxOPT_NET/ 2 records)
> DocSearch: https://www.echoxu.cn/tomcattips/ 2 records)
> DocSearch: https://www.echoxu.cn/pythonskill/ 2 records)
> DocSearch: https://www.echoxu.cn/docker/ 2 records)
> DocSearch: https://www.echoxu.cn/LinuxOPT_Basic/ 2 records)
> DocSearch: https://www.echoxu.cn/timewaitOPT/ 123 records)
> DocSearch: https://www.echoxu.cn/vagrantBase/ 271 records)
> DocSearch: https://www.echoxu.cn/vpcormobile/ 43 records)
> DocSearch: https://www.echoxu.cn/mysqlHA/ 2 records)
> DocSearch: https://www.echoxu.cn/mysqlHP/ 2 records)
> DocSearch: https://www.echoxu.cn/varnish/ 2 records)
> DocSearch: https://www.echoxu.cn/git/ 2 records)
> DocSearch: https://www.echoxu.cn/apachetips/ 2 records)
> DocSearch: https://www.echoxu.cn/NETTools/ 2 records)
> DocSearch: https://www.echoxu.cn/readonly/ 43 records)
> DocSearch: https://www.echoxu.cn/openstack/ 2 records)
> DocSearch: https://www.echoxu.cn/saltstack/ 2 records)
> DocSearch: https://www.echoxu.cn/ansible/ 2 records)
> DocSearch: https://www.echoxu.cn/jenkins/ 2 records)
> DocSearch: https://www.echoxu.cn/cobbler/ 2 records)
> DocSearch: https://www.echoxu.cn/zabbix/ 2 records)
> DocSearch: https://www.echoxu.cn/ELK/ 2 records)
> DocSearch: https://www.echoxu.cn/networkErr/ 2 records)
> DocSearch: https://www.echoxu.cn/softErr/ 2 records)

Nb hits: 3682        #指的是现有的记录数
这时候你到 algolia dashboard 中indiecs中可以看到生成了很多索引数据,总记录数就是上面的Nb hits
通过 algolia-scraper 程序自行构建索引
此种方法是通过 algolia-scraper 程序自行构建索引,为啥不推荐此中方法呢,因为需要安装很多依赖包,很麻烦.
因为 algolia-scraper 是用 python 编写的且需要用到 scrapy,需要先安装 python3.6 及 scrapy.
为什么不用 python3.7?
在 3.7 中不能通过 pipenv 安装 Twisted
- 安装 python3.6 及依赖包
sudo yum install sqlite-devel xsel xclip bzip2 bzip2-devel python-devel python34-devel openssl openssl-devel
wget https://www.python.org/ftp/python/3.6.0/Python-3.6.0.tar.xz
cd Python-3.6.0
tar -xvJf Python-3.6.0.tar.xz
sudo ./configure --prefix=/usr/local/python3.6 --with-ssl                       #--enable-optimizations了解下
sudo make -j 4
sudo make install
设置 python3.6 为默认 python 版本请参考: python2 与 python3 共存
搭建 docsearch-scraper 虚拟环境
sudo ln -s /usr/local/python3.6/bin/pipenv /usr/bin/pipenv
git clone git://github.com/algolia/docsearch-scraper.git
cd ~/docsearch-scraper
pipenv install  --python /usr/local/bin/python3.6      # 安装pipenv虚拟环境
pipenv shell            # 激活虚拟环境

# 安装虚拟环境软件包:

pipenv install python-dotenv
pipenv install Twisted
pipenv install scrapy
pipenv install future
pipenv install algoliasearch
pipenv install selenium
pipenv install tldextract
pipenv install Pyperclip
pipenv install PyGTK
pipenv  install sip
pipenv install PyQt5
- 生成
.env及 config.json 文件
请参考上面的生成.env及 config.json 文件章节.
提示
此处的目录应切换到docsearch-scraper的根目录
- 生成索引
cd ~/docsearch-scraper
pipenv shell
./docsearch run ~/docsearch-scraper/config.json        # 或者 ./docsearch docker:run ~/docsearch-scraper/config.json
这样索引就生成了.
测试
将~/docsearch-scraper/playground/index.html放到 nginx 下即可测试索引数据。
vuepress 中使用 algolia
在config.js中配置themeConfig.algolia;
你可以通过 themeConfig.algolia 选项来用 Algolia 搜索替换内置的搜索框。 要启用 Algolia 搜索,你需要至少提供 apiKey 和 indexName:
module.exports = {
  themeConfig: {
    algolia: {
      appId: "<APPID>", //当你使用的是自建algolia服务器或者API调用时需要填写此项,否则会报错invaild apikey or IndexName
      apiKey: "<API_KEY>", //填写你的Search-Only API Key
      indexName: "<INDEX_NAME>", //填写你的index名称,Indices >>>> 你的application名 >>>> Copy Index Name
    },
  },
};
注意
appId只有在使用自建 algolia 服务器时才需要提供.
在使用 algolia 托管时或者修改了node_modules/docsearch.js/dist/cdn/docsearch.min.js的appId = _ref$appId === undefined ? "BH4D9OD16A" : _ref$appId默认值为自己的 appId 时才不需要提供 appId
添加 algolia 代码到项目中
需要编辑index.ssr.html以及index.dev.html,前者用于 build 时生成 html 的模板文件,或者是开发测试环境时生成 html 的模板文件.
注意
这是比较粗略的方法,可用enhanceAPP.js来个性化定制输出内容.
vim node_modules/@vuepress/core/lib/client/index.ssr.html
在<body>里添加如下:
<body>
  <!--vue-ssr-outlet-->
  {{{ renderScripts() }}}
  <script
    type="text/javascript"
    src="https://cdn.jsdelivr.net/npm/docsearch.js@2/dist/cdn/docsearch.min.js"
  ></script>
  <script type="text/javascript">
    docsearch({
      appId: "yourappId",
      apiKey: "yourapiKey",
      indexName: "yourindexName",
      inputSelector: "#algolia-search-input",
      debug: false,
    });
  </script>
</body>
vim node_modules/@vuepress/core/lib/client/index.dev.html
在<body>里添加如下:
<body>
  <div id="app"></div>
  <script
    type="text/javascript"
    src="https://cdn.jsdelivr.net/npm/docsearch.js@2/dist/cdn/docsearch.min.js"
  ></script>
  <script type="text/javascript">
    docsearch({
      appId: "yourappId",
      apiKey: "yourapiKey",
      indexName: "yourindexName",
      inputSelector: "#algolia-search-input",
      debug: false,
    });
  </script>
</body>
提示
查看 vuepress 中的 algoliasearch 的源码看到需要$lang变量,所以在config.js中需要设置locales
附上 config.js:
const navConf = require("../../config/navConf.js");
const pluginConf = require("../../config/pluginConf.js");
const sidebarConf = require("../../config/sidebarConf.js");
const headConf = require("../../config/headConf.js");
const secretKeyConf = require("../../config/secretKeyConf");
module.exports = {
  title: "用心记,放心阅,方便查",
  description:
    "echoxu.cn是一个IT知识点记录并整合的文档生成器.IT知识,文档管理,文档记录,文档生成器",
  locales: {
    "/": {
      lang: "zh-CN",
      title: "用心记,放心阅,方便查",
      description:
        "echoxu.cn是一个记录IT知识点的文档生成器.IT知识,文档管理,文档记录,文档生成器",
    },
  },
  head: headConf,
  plugins: pluginConf,

  themeConfig: {
    locales: {
      "/": {
        selectText: "选择语言",
        label: "简体中文",
        lastUpdated: "上次更新",
        sidebarDepth: 2,
        nav: navConf,
        sidebar: sidebarConf,
        // serviceWorker: {
        //     popupComponent: 'MySWUpdatePopup',
        //     updatePopup: {
        //         message: "啦啦啦,一大波内容已更新!",
        //         buttonText: "朕知道了"
        //     }
        // },
        algolia: {
          appId: secretKeyConf.appId,
          apiKey: secretKeyConf.apiKey,
          indexName: secretKeyConf.indexName,
        },
      },
    },
  },
};
目前在 dev 环境下不能使用 algolia 搜索,待解决.
附上截图:

更多选项请参考 Algolia DocSearch 的文档
其他工具:
google 提供的 sitemap.xml 制作工具下载地址
使用 matomo analytics
使用 vue-matomo 插件
有网友提供了用于 vuepress 的 matomo 插件,使用yarn add vuepress-plugin-matomo即可安装,项目地址: vue-matomo
使用 matomo 作为统计工具,别问我为什么不用 google analytics? 因为人在墙内.
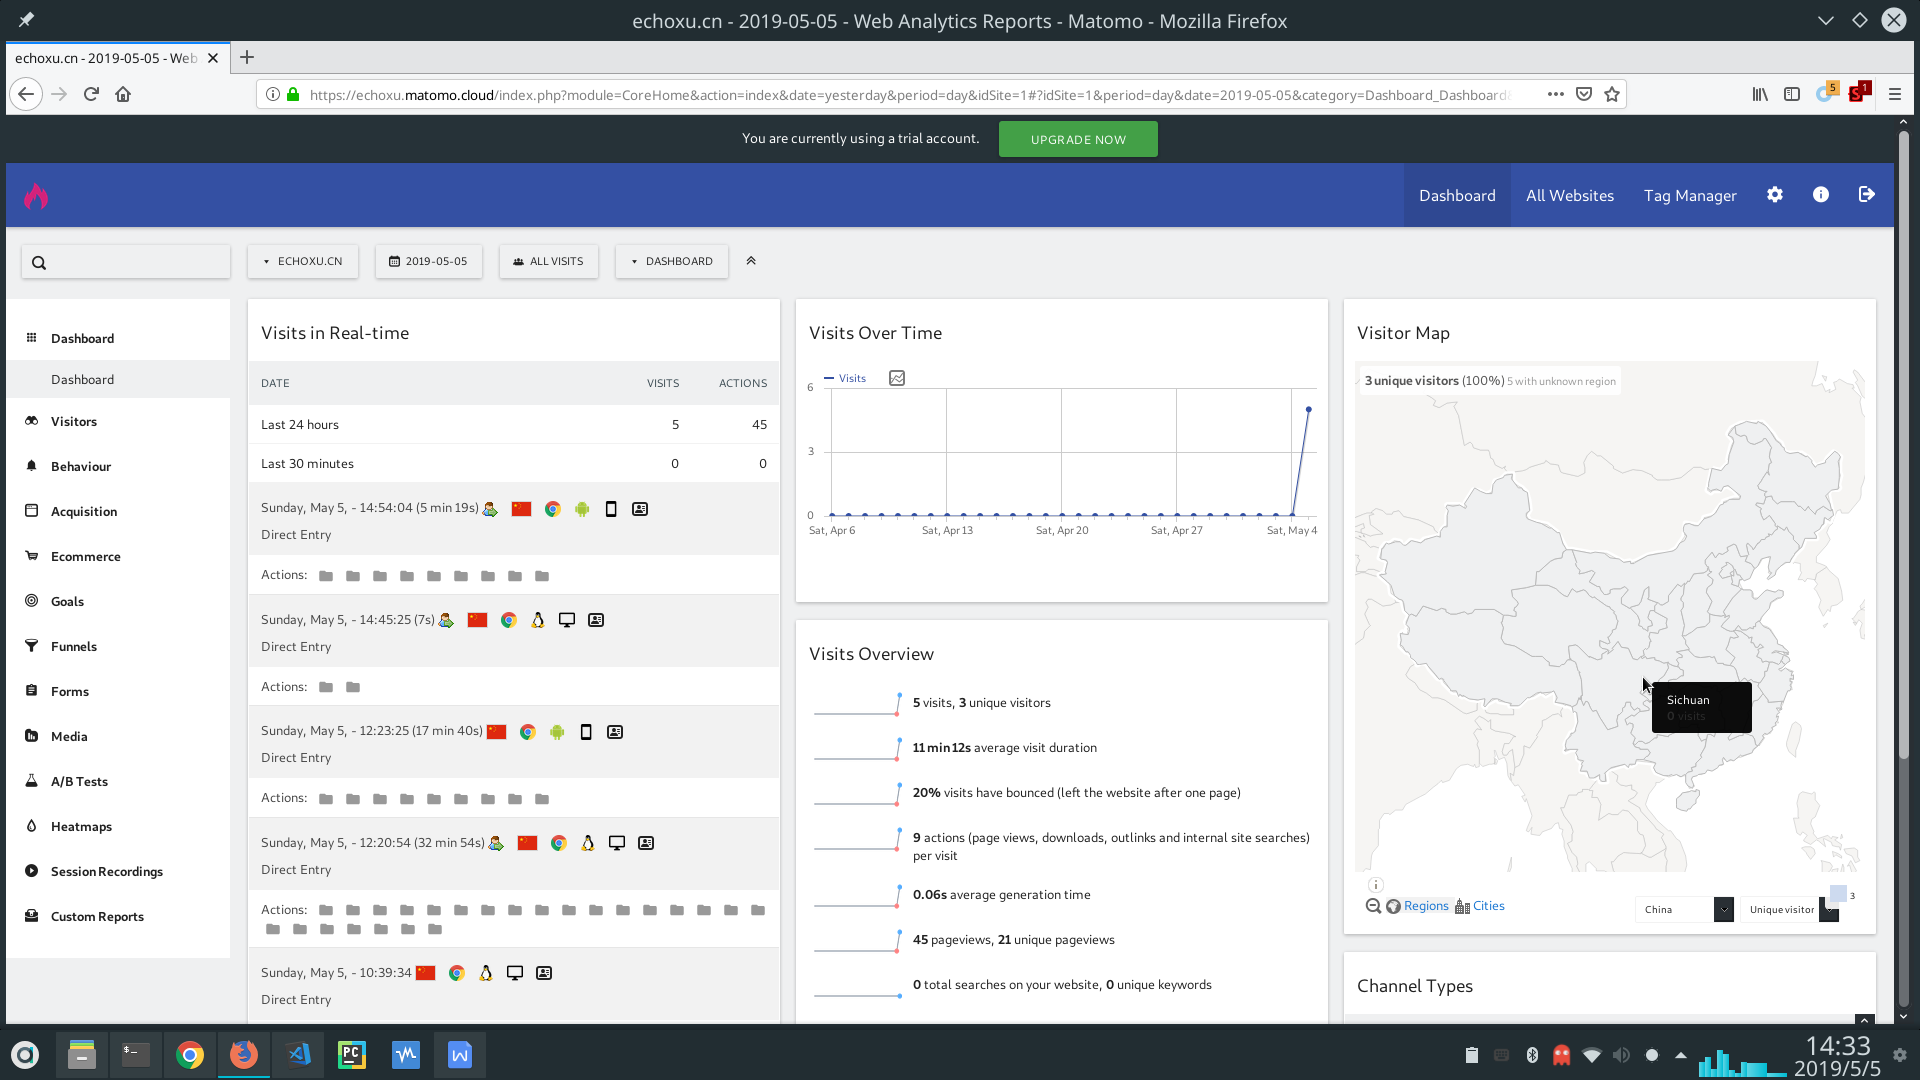
这里先不介绍怎么搭建 matomo 服务器,我现在使用的是 matomo 提供的 cloud host,可以免费使用 30 天,等到期后我再介绍如何自建 matomo
使用 matomo cloud host 他们会提供你 login 相关的信息,以及一段 js 代码.
将 js 代码加入到<head></head>内即可.
- 在
<head>里加入 matomo analytics
vim config.js
添加
head: [
    ['link', { rel: 'apple-touch-icon', href: 'https://cache.echoxu.cn/blogimg/apple-touch-icon.png' }],
    ['link', { rel: 'icon', href: 'https://cache.echoxu.cn/blogimg/favicon-32x32.png' }],
    ['link', { rel: 'manifest', href: '/manifest.json' }],
    ['link', { rel: 'mask-icon', href: 'https://cache.echoxu.cn/blogimg/safari-pinned-tab.svg' }],
    ['meta', { name: 'theme-color', content: '#3eaf7c' }],
    ['meta', { name: 'msapplication-TileColor', content: '#3eaf7c' }],
+    // add matomo analytics
+    ['script', {}, `
+      var _paq = window._paq || [];
+      _paq.push(['trackPageView']);
+      _paq.push(['enableLinkTracking']);
+      (function() {
+        var u="https://echoxu.matomo.cloud/";
+        _paq.push(['setTrackerUrl', u+'matomo.php']);
+        _paq.push(['setSiteId', '1']);
+        var d=document, g=d.createElement('script'), s=d.getElementsByTagName('script')[0];
+        g.type='text/javascript'; g.async=true; g.defer=true; g.src=u+'matomo.js'; s.parentNode.insertBefore(g,s);
+  })();`
+  ],
  ],
到这里就完成了集成 matomo analytics.
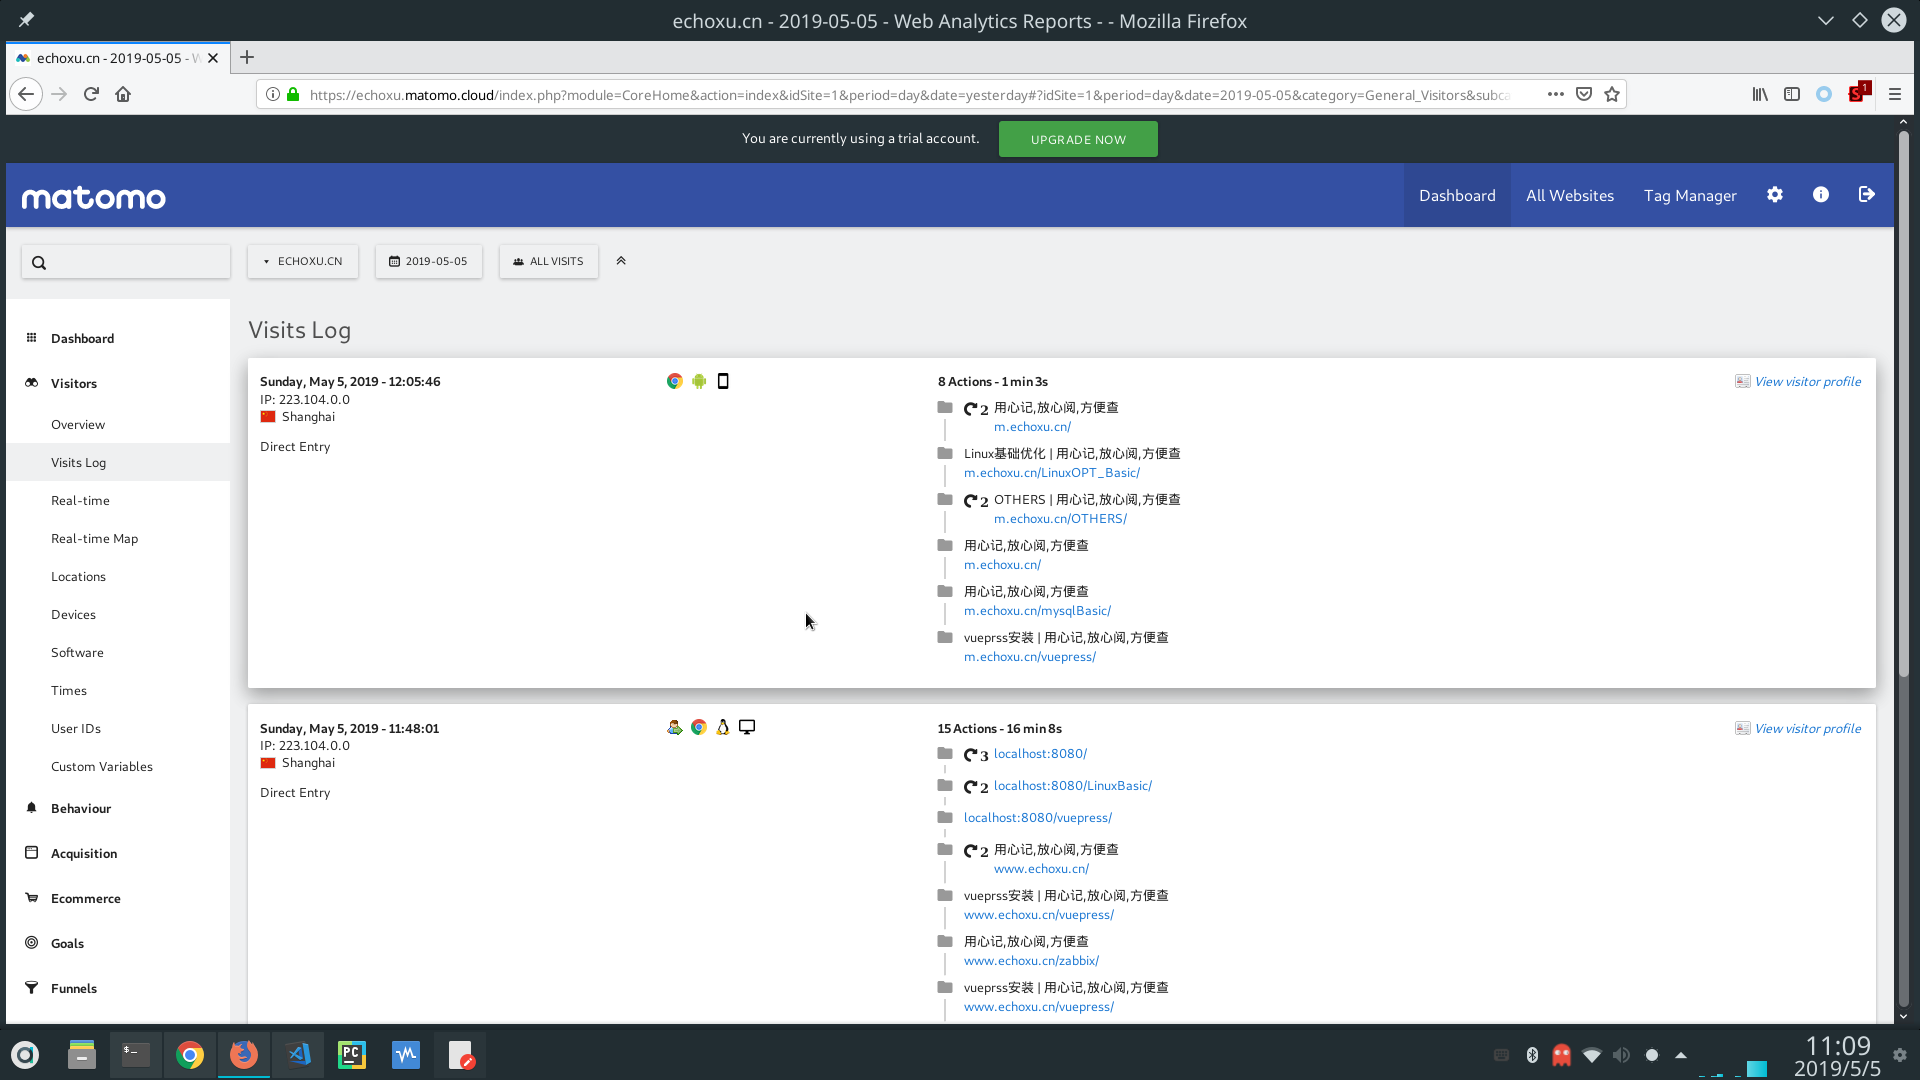
效果图:


参考:
隐藏敏感信息
在 config.js 中会有一些敏感信息然而这些敏感信息我们不希望上传到公网,可以借助.gitignore 实现.
- 首先建立
config/secretKeyConf.js
内容如下:
module.exports = secretKeyConf = {
  appId: "xxxxxx",
  appKey: "xxxxxx",
  ga: "xxxxxx",
  googleSearchConsole: "xxxxxx",
};
- 在插件配置文件
config/pluginConf.js里添加如下内容:
vim config/pluginConf.js
添加:
// config/pluginConf.js
const secretKeyConf = require("./secretKeyConf.js");

module.exports = {
  "@vuepress/google-analytics": {
    ga: secretKeyConf.ga,
  },
};
- 在
.gitignore文件中添加config/secretKeyConf.js
cat .gitignore
显示结果如下:
.vscode
node_modules
config/secretKeyConf.js
Menu 及 Sidebar 优化
若将所有内容放置在 docs/.vuepress/config.js 下将会很臃肿,难以阅读与维护,推荐将其分离开,在根目录下新建一个 config 文件夹:
下面是优化过的 config.js 内容:
//docs/.vuepress/config.js
const navConf = require("../../config/navConf.js");
const pluginConf = require("../../config/pluginConf.js");
const sidebarConf = require("../../config/sidebarConf.js");
module.exports = {
  plugins: pluginConf,
  themeConfig: {
    lastUpdated: "上次更新",
    sidebarDepth: 2,
    nav: navConf,
    sidebar: sidebarConf,
  },
};
经过上面的优化将 menu、plugin、sidebar 分别拆分开来,方便以后对导航进行添加.
menu 导航内容:
//config/navConf.js
// Menu路由
module.exports = [
  {
    text: "LINUX",
    items: [
      { text: "Linux基础知识", link: "/linuxbasics/" },
      { text: "Linux安全及优化", link: "/secandopt/" },
      { text: "Linux故障与维护", link: "/Failureandmaintenance/" },
      { text: "常用工具", link: "/toolshelp/" },
      { text: "虚拟化", link: "/Virtualization/" },
    ],
  },
  {
    text: "DATABASES",
    items: [
      { text: "Mysql", link: "/mysql/" },
      { text: "Redis", link: "/redis/" },
      { text: "MongoDB", link: "/mongodb/" },
    ],
  },
  {
    text: "WEBSERVERS",
    items: [
      { text: "Nginx", link: "/nginx/" },
      { text: "Tomcat", link: "/tomcat/" },
      { text: "Apache", link: "/apache/" },
    ],
  },
  {
    text: "BASIC SERVICE BUILDING",
    items: [
      { text: "基础服务安装", link: "/basicservicebulding/" },
      { text: "缓存", link: "/proxy/" },
    ],
  },
  {
    text: "DEVOPS",
    items: [
      { text: "微服务", link: "/Microservice/" },
      { text: "Python", link: "/python/" },
      { text: "WEB前端", link: "/webdev/" },
    ],
  },
  { text: "OTHERS", link: "/others/" },
];
其实最难的还是 sidebar 的内容,我的需求是每个页面对应不同的 sidebar 内容,如果全写在一个 sidebarconf.js 中那也很臃肿,具体实现请参考:
上述链接中的方法不适合本站,暂时采用的还是在一个 sidebarConf.js 文件写侧边栏导航.
在windows中使用上传图片到七牛的脚本
需求:
在windows中使用脚本上传图片到七牛
不需要学习bat脚本语言,继续使用shell作为脚本语言
解决方案:
- 将原来linux中的shell脚本在gitbash中执行就可以实现以上需求。
先添加七牛密钥:qshell account 你的七牛ak 你的七牛sk 设定你的名字 ,还需要下载 qshell 工具:qshell 下载地址
下面是在windows中上传图片到七牛的脚本内容:
#!/bin/bash
dir=D:\\ProgramFiles\\vuepress\\docs\\.vuepress\\public\\images
# 如果图片暂存区为空时不执行上传操作
if [ $(ls -A ${dir} | wc -l) != 0 ]; then
echo "----------------------------------"
echo ""
echo "开始上传图片到七牛!"
echo ""
echo "----------------------------------"
qshell qupload2 --thread-count=10 --rescan-local --src-dir="D:\\ProgramFiles\\vuepress\\docs\\.vuepress\\public\\images" --bucket=blog --success-list=D:\\ProgramFiles\\vuepress\\docV1imgbak\\success.txt --failure-list=D:\\ProgramFiles\\vuepress\\docV1imgbak\\failure.txt --overwrite-list=D:\\ProgramFiles\\vuepress\\docV1imgbak\\overwrite.txt --up-host="http://upload.qiniu.com"
else
echo "图片暂存区为空,请待添加图片后再执行上传操作"
exit 1
fi
# 当上面的操作顺利执行时才会触发替换图片地址等操作
if [ $? -eq 0 ]; then
cat /dev/null >D:\\ProgramFiles\\vuepress\\getmdlinkBefore.txt
# 获取需要上传的图片的本地路径并记录到getmdlinkBefore.txt中,内容格式: "D:\ProgramFiles\vuepress\docs\.vuepress\public\images\test.txt"
for filename in $(ls ${dir}); do
echo ${dir}\\$filename >>D:\\ProgramFiles\\vuepress\\getmdlinkBefore.txt
done
cat /dev/null >D:\\ProgramFiles\\vuepress\\getmdlinkAfter.txt
# 将记录的本地图片路径替换成markdown格式的图片链接,格式为: 
cat D:\\ProgramFiles\\vuepress\\getmdlinkBefore.txt | sed 's/D:\\ProgramFiles\\vuepress\\docs\\.vuepress\\public\\images\\/\!\[wwwechoxu\]\(https:\/\/cache.echoxu.cn/blogimg/g' | sed 's/$/\)/g' >>D:\\ProgramFiles\\vuepress/getmdlinkAfter.txt
echo "----------------------------------"
echo ""
echo "图片链接地址已保存到getmdlinkAfter.txt,请打开getmdlinkAfter.txt并复制里面的内容到vuepress中使用."
echo ""
echo "----------------------------------"
# 清空存放图片的目录,这样就不会重复上传已经上传过的文件
cd ${dir}
mv * D:\\ProgramFiles\\vuepress\\docV1imgbak\\
echo "----------------------------------"
echo ""
echo "已清空图片暂存目录!"
echo ""
echo "----------------------------------"
echo "----------------------------------"
echo ""
echo "成功上传图片到七牛!"
echo ""
echo "----------------------------------"
else
echo "上传失败"
exit 1
fi
FAQ
- 不显示 lastupdate
- vuepress 是根据你的 git commit 记录来显示上次更新的时间的,需要将
dist目录添加到.gitignore中 - 所以你需要将 vuepress 根目录添加到 git 仓库,即:需要在 vuepress 根目录执行
git init && git add . && git commit -m "commit at: $(date "+%Y-%m-%d %H:%M:%S")" - 然后提交到你已经创建的裸仓库中:
git push -u vuepress master,这样就可以在 vuepress 中显示上次提交的更新了。 - 参考:https://www.imooc.com/article/322864
- vuepress 是根据你的 git commit 记录来显示上次更新的时间的,需要将
- vuepress2 编译时报错
✖ Rendering pages - failed TypeError: Invalid value used as weak map key- 检查你的 md 文件中是否有
<center> 和 <font>标签 - https://v2.vuepress.vuejs.org/zh/guide/markdown.html#%E7%BB%84%E4%BB%B6
- https://v2.vuepress.vuejs.org/zh/guide/markdown.html#%E4%BB%A3%E7%A0%81%E5%9D%97
- 检查你的 md 文件中是否有